Wednesday, July 23, 2014

Back to School-Student Gift

The last couple of years, we've held our back to school night before school starts. I have to say, I really love that. It's the first time I get to meet my students, and they can bring in all their school supplies and drop them off. It's always fun to have a little something for those who come. In my effort to move away from candy, I searched for something fun and different to give this year.

I found these cute mini flashlights on Amazon. Kids love flashlights, and it even has a keychain so they can attach it to their backpack.


Bright Year Printable Tag
Delightful Year Printable Tag


Check out my treat from last year's back to school night.
Let's Stick Together for a Great Year

Sunday, July 20, 2014

Instagram Album

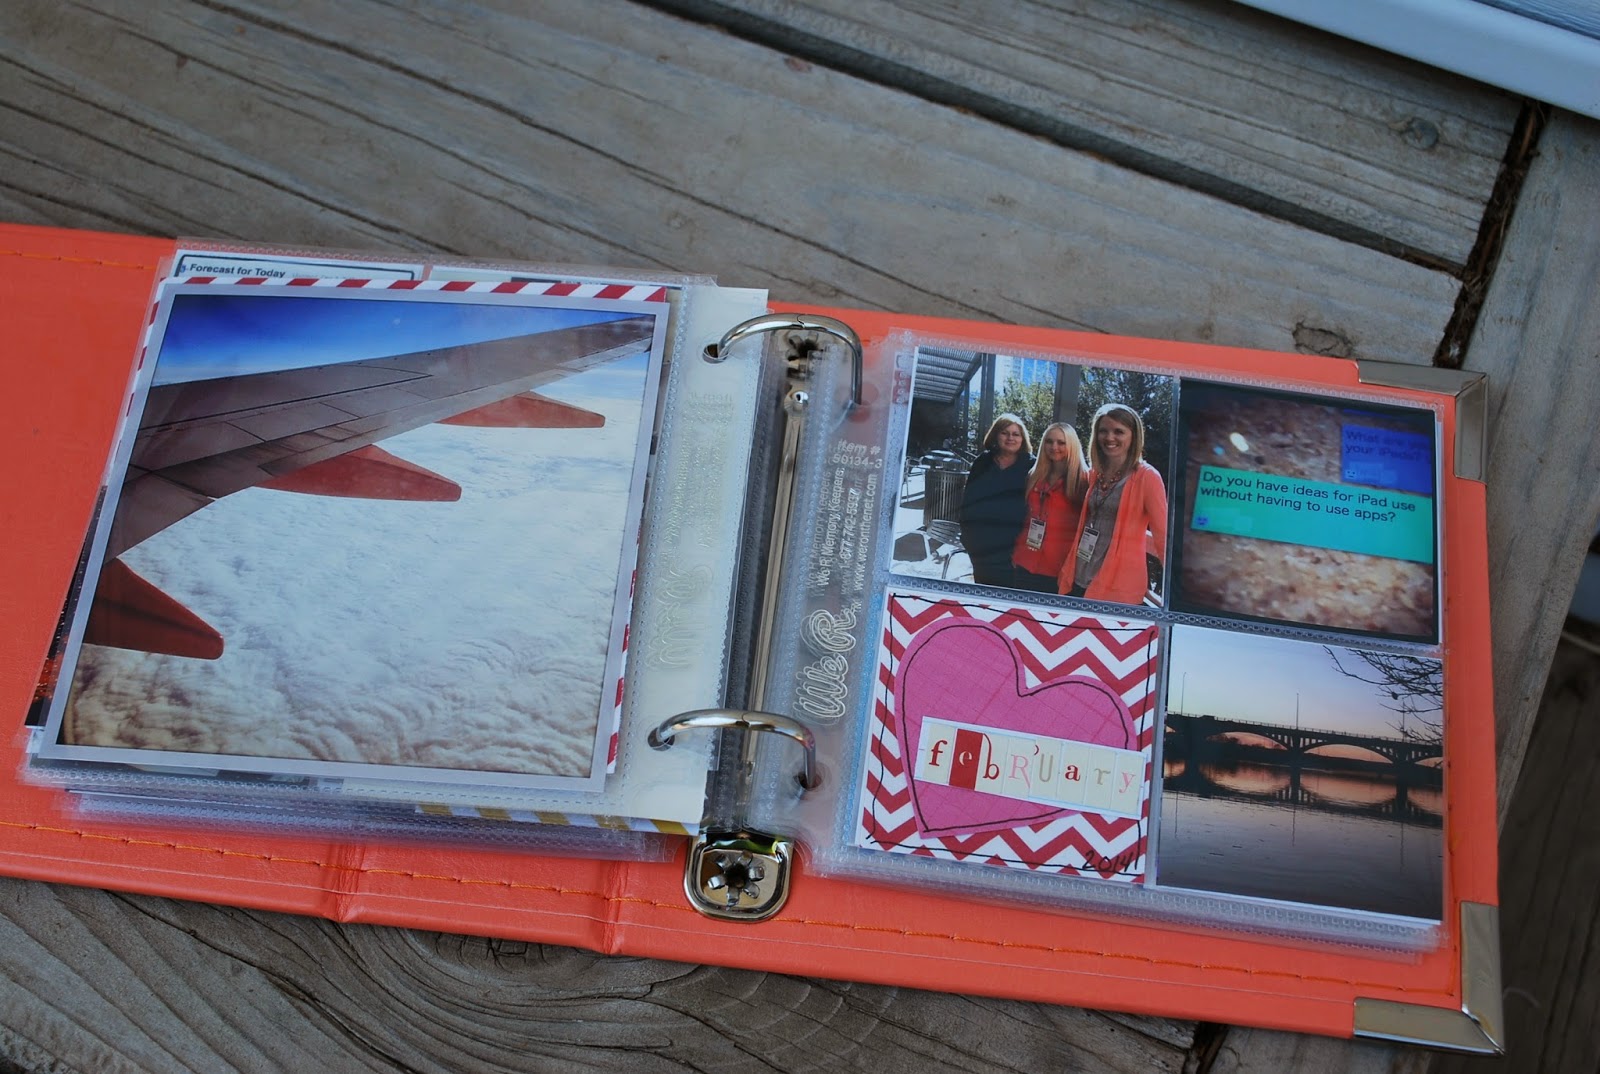
Last year, after I started using Instagram. I wanted a tangible way to document the pictures I was taking, so I started an album--and did nothing with it after that..haha! 

I found some sheet protectors that were 4x4 and used book rings to hold the pages together. I just didn't love it, so I didn't keep up on it.

A year later, I've taken quite a few pictures through Instagram and love that it is a way to document every day pictures. Honestly, I just don't carry my camera around with me and take pictures any more. But, I always have my phone with me and for me right now--it's perfect. 

I started looking around the Internet to see what was out there and what people have done with their Instagram photos. There are a few companies that you can create digital books and I played with them a little, but it wasn't really what I wanted. I came across this album from We R Memory Keepers and loved it. It is soooo cute. It's only 4"x4". It's little. It's cute! It's perfect!

 
 It come with a few sheet protectors. There are two different sizes for this album. One is a 4"x4" protector and the other had 4 2"x 2" slots.

 
After I uploaded all my Instagram photos to my computer, I started to print them. Using Photoshop, I placed four pictures on a 4x6 file. This game me four 2-inch square prints on a sheet.

 
Then I cut them apart. Look how cute they are in their tiny-ness. There are companies that will print your photos this square size. Once I had all the photos printed and cut, I started placing them in the sheet protectors. It probably took me 2-3 hours to complete the whole year's worth of photos.


Saturday, July 19, 2014

Photo Booth Props...that last

I've done several photo booths over the past year. They are so much fun to do and who doesn't love a little prop that makes it okay to look and act cheesy in a picture. The one problem I have with photo booths are that the props don't last. That's a great thing if you are never going to do one again, but if you have a booth frequently, you have to cut the props out again and again. I've been afraid to laminate the props for feat they would give a glare in the picture.
 
Well, as I'm cutting out props the night before our 5th grade party, I have a brilliant idea!!! Cut them out of wood. BrIlLiAnT!!! I actually had a moustache and pair of glasses from the Wood Connection and those props seemed to get used most, so I thought why not cut them all out of wood?  Okay--it was like 9:00 at night when I had this epiphany, so I cut some shapes with my Silhouette and sent my mother to cut them out.
 
 I grabbed the spray paint I had on hand and started spraying in the little light that was left. But, I managed to get everything sprayed (barely), and used pieces of dowel left over from other projects for the handles.  The best part--I'm ready for a photo booth anytime.

Friday, July 18, 2014

Gift Bag Wow!

Need something to dress up a gift bag?
I bought these cute chevron gift bags at Michael's a while ago because they were so cute.
For a Young Women's activity, we did a hygiene and beauty night. We decided to give the girls some little goodies. Well--I thought I had clear bags to put them in--but realized a couple hours before--I didn't. But, I did have these cute gift bags and they worked perfectly. I felt like they needed a little something more though.
I decided to create this cute little printable to help remind the girls that the best way to be beautiful is to be yourself. It serves two purposes--it broke up all that chevron, AND...they can take it off and put it somewhere as reminder.
 
It really made the bag go from cute pattern, to CuTe!!! I bet there's a great gift inside.
It's all in the packaging!!


If you can use this tag, here you go..
Be*You*Tiful printable

Wednesday, July 9, 2014

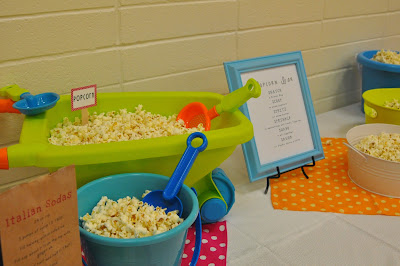
Italian Soda and Popcorn Bar

First up was the Italian Sodas. We've been making these for a year now and they are really fun addition to a party and perfect for large groups because everyone can mix their own. It's really easy too. We did invest in the pumps for our flavoring a couple months ago and it is so much easier to use than having to pour out the flavoring and measure.
 
Since it's summer, we decided to use beach toys for our display. Again, pretty easy to set up. We had popcorn in various containers, with some flavoring, and candies that could all be mixed in the brown paper bag.


Tuesday, July 8, 2014

Paper Bag Printing

Merlynn has to do the treats for Relief Society activity focused on family reunions. She decided to do Italian Sodas and a Popcorn bar. These are fun, quick, easy treats that can be used for large groups of people. We decided to print the directions on the bag people would put their popcorn in. That way there wouldn't be extra papers and she wouldn't have to repeat the instructions again and again.
 
It's pretty easy to print on a paper bag. Well, that is if you can get your printer to work ---mine was not cooperative for this project. All you need to do is create your document in Microsoft Word and change the paper size to that of the paper bag. Type up what you want, then send your paper bag through the printer.
 

Thursday, July 3, 2014

Layered 4th of July drinks

Today we tried something that was super easy and totally for the 4th of July. For the past couple of weeks we have been seeing this layer drink on Pinterest so I thought I would give it a try. I figured it would be easy and both the girls could help make it. It was so fun and the best part was it tasted good. The combination of the crane-apple and the pina o coloda tasted really good. I followed the directions from this website. http://www.inkatrinaskitchen.com/2012/06/july-4th-layered-drinks.html
One thing that we had to be careful of was to poor the drink onto the ice so that they wouldn't mix. I think that is why there isn't as much white.

4th of July and burlap

A couple months ago, I saw these really cool burlap canvases at Wal-Mart, so I bought them, knowing I would be able to do something fun with them. I've been looking at this cute burlap banner from Eighteen25 to make--but I've ran out of time (and I didn't have a foam brush when I went to make it), so I decided to use the same idea for the burlap canvases.


First, I gave the canvas a few coats of paint. I cut a star with my Silhouette, and used the negative space for my stencil.


Next, I used a foam dauber to make polka dots, and they were done. They were really quick and easy to make. I do wish I had an 8x10, so they were different sizes. Bonus: I can use the red polka dot for Valentine's Day decorations also.


Wednesday, July 2, 2014

Organizing Pinterest Boards

My Pinterest Boards have been driving me crazy lately. I can't seem to ever find what I'm looking for. So, I decided to organize them. Yep--I organize everything--and it makes me hApPy!

Last summer, I decided to put the boards I access most frequently at the top of my Pinterest page. It was a great idea, but I usually ended up scrolling through everything looking for what I wanted. So--I decided to alphabetize everything.  Now, I just have to remember the name of the board..haha!
It was a little bit of a pain to alphabetize them. To change the order of your boards, you just drag the board, and drop it where you would like it to be. Pretty easy, just time consuming when you have 65 boards.

The next thing I wanted to do was make my boards look nicer. Some of the pins I have as the board cover look okay, but some don't, and I've never really took the time to choose pins as the board cover. I've seen a few Pinterest boards that had custom board covers. Having everything look uniform and nice and neat---that sounded right up my alley. So, I searched around a little to find the measurements. Pinterest Cheat Sheet to Image Sizes This neat little sight tells you the dimensions for all things Pinterest.
Once I had the dimensions, I created a board cover in Photoshop, but, PowerPoint would work as well. Then the fun began.

In order for these files to become my Board covers, I needed to pin them. I didn't really want to flood my Pinterest feed with these pictures, I created a secret board title Pinterest Board Covers. I then uploaded each picture to this board. The great thing about secret boards? Nobody sees them but you!!

Now I needed to edit the Pin. To do this, I clicked on the pencil. Then I had to change the Pinterest Board. In the example below, I changed it to Gifts.  Once you click SAVE CHANGES, it will ask you if you're sure. You are DEFINITLEY SURE:)
 
Now to actually get the cover changed, hover over the middle of that particular board and you will see Change Cover appear. Click on that.
 
 
Using the arrows, you can scroll through your pins. Once you've found the pin you want to use as a board cover, click SAVE CHANGES.
 
 
 Now you will have an organized, uniform Pinterest Board. Now, I'm working on going through all the pins I have. Who really uses over 2,000 pins? It's been going to go through and purge each board. I've found pins I really want to do still and other pins make me laugh and wonder what I was thinking.

Tuesday, July 1, 2014

4th of July Projects

The last year or two has been really busy for me and it seems like I am always working on some project or another. I started this blog a few summers ago, with the idea that I would post something creative every day. HaHa--It was a great idea---but sometimes it's months before I post anything. Well--since it's summer, which means more free time for me, I thought I would pick back up on the idea of doing something creative every day. So, for the month of July, I'm going to try to do something creative every day and post it.

So, first project. I love the 4th of July--it's one of my favorite holidays. I've seen some really cute, fun projects around the web, so I decided to make some fun, new items.

I saw these here, and knew I had to make them. Polka dots just make everything cuter and these were Soooo easy!!! I even made one for each of the ladies I visit teach. Note: I did not make mine out of 4x4, I felt that would be way too big.

Next up--I have a slight chevron obsession, so when I saw the Wood Connection had a star painted chevron, I knew I needed to make it. Well, I could never get to the store to buy it, so I had to make my own star pattern. That was a little hard, and truthfully, I don't really love it. It turned out okay, so I don't know that I will keep it forever. But, it's cute for now.