Wednesday, December 31, 2014

Snowflakes--Pallets and Pillows

I gave my friend a "White Christmas" for her gift. Everything in it was white, but I needed some good handmade stuff in it. So--I searched Pinterest for ideas. I did this fun pillow cover. I sketched out a snowflake with a pencil and then hot glued the buttons on. It was  a lot easier than I thought--and I even did it myself :)


This one I'm just in LOVE with. This guy is made from pallet wood we had left over from another project and nailed together in the shape of a snowflake. Pretty simple (once we got the size and shape figured out). I love how rustic looking it is.


Tuesday, December 30, 2014

Christmas in the Classroom

A couple fun things from my classroom this year. We made these a*dor*able snowmen as our ornaments. It's a round cut from a tree trunk (If you buy them--they're $3 a piece--No, I didn't buy them). They were really simple and the kids did everything but hot glue the nose on.


I did these stockings last year, but I put them out the first day of December. Then, each student was assigned someone every day to write a nice note to. We put them in the stockings. We learned kids don't know how to give a compliment...we're better at it now. They were so excited to be able to read the notes.


Christmas trees for our parents. For the first time in the five years I've been doing these--I messed up when I snipped the fabric. But, it worked out. The kids were excited to give them to their parents. I now have some kids who have 3 of these at home---Wow!---


Monday, December 29, 2014

Caring and Sharing 2014

I am really excited about how our Caring and Sharing tree turned out this year. I will admit I was really nervous because I had one idea and the lady I work with had another, but when it was finished, I had to admit it is the cutest one we've done. The lady I work with ended up buying it (again)--and gave me last year's tree that she bought. So now we each have one that fits our taste and style. She's getting really close to retirement, so this may have been our last year. Kinda makes me sad.
The star on top is made of chicken wire and twigs and the tree sits in an old tin wash basin. 

 The students in our classes make all the ornaments---and this is the first year I haven't had to go back and fix them. 
 My mom helped eleven fifth graders sew these reindeer. She has  a lot more patience than me and they are full of character.
 We used twine, wrapped it around a balloon and then dipped in diluted glitter mod podge. Surprisingly, I had a boy who was awesome at this.

I loved how these turned out. We just mod lodged burlap on the star. Notice the dried oranges too. The kids were pretty funny about these--they wanted to know how old the oranges were.
 This is just wrapping paper fan-folded.


Sunday, December 28, 2014

Barnwood Joy Sign

Let's catch up a little before the beginning of the new year...

We had a really fun family Pinterest Party in November. We selected about ten projects and then had people sign up for what they wanted to make. It was fun, but a lot of work (and on a day I had a big paper for school to turn in).

One of my favorite projects was this old wood Joy sign. The bonus was how simple it was to do.
My mom cut up lengths of wood from an old fence at my grandma's house. We whitewashed the sign, then used a stencil to paint the letters, tied a bow and it was done.


Saturday, November 29, 2014

December Daily-Join Us!

Hey....we're still alive!!
I haven't posted in a while. For some reason I thought it would be a good idea to go back to school for my Master's degree. That pretty much takes up all the time that I have. But, two weeks and I've finished the first semester. WooHoo!! (Can you tell I'm pretty excited about that ;)

It's been a couple years since we did the December Daily challenge. It really was fun to do and I need an incentive to get me back into taking pictures and documenting my life. I kind of can't wait to compare the two years either. So--join us if you'd like. We'd love to see what you do during the month of December. You can do everything based on Christmas or just every day life, or both. I'm going to go for a mix of both and my goal is to maybe include myself in more pictures. (maybe)

I'll be posting my pictures on Instagram. I LOVE Instagram. Plus, that means it's more likely I will actually get a picture and get it posted. I'd love to see you on Instagram too. I'll be using the  #daysofdecember for my pictures. Let us know if you'll be joining so we can be looking for your pictures. Happy picture-taking.


Saturday, October 4, 2014

Pallet Signs

Here are a few projects that Ashley and Steve helped me with.
The secret to these signs: We went to Mabey's pallets and bought the pallet boards already stripped from the pallet. Each board cost $.25. We cut them in half and you could have two signs out of 10 boards for the fall one and 2 signs out of six boards for the O Holy Night. For the O Holy Night I put the Star on with Vinyl and then stained the board. That is what gives the board the dark look. I took off the vinyl and then Ashley painted the words on.

Wednesday, July 23, 2014

Back to School-Student Gift

The last couple of years, we've held our back to school night before school starts. I have to say, I really love that. It's the first time I get to meet my students, and they can bring in all their school supplies and drop them off. It's always fun to have a little something for those who come. In my effort to move away from candy, I searched for something fun and different to give this year.

I found these cute mini flashlights on Amazon. Kids love flashlights, and it even has a keychain so they can attach it to their backpack.


Bright Year Printable Tag
Delightful Year Printable Tag


Check out my treat from last year's back to school night.
Let's Stick Together for a Great Year

Sunday, July 20, 2014

Instagram Album

Last year, after I started using Instagram. I wanted a tangible way to document the pictures I was taking, so I started an album--and did nothing with it after that..haha! 

I found some sheet protectors that were 4x4 and used book rings to hold the pages together. I just didn't love it, so I didn't keep up on it.

A year later, I've taken quite a few pictures through Instagram and love that it is a way to document every day pictures. Honestly, I just don't carry my camera around with me and take pictures any more. But, I always have my phone with me and for me right now--it's perfect. 

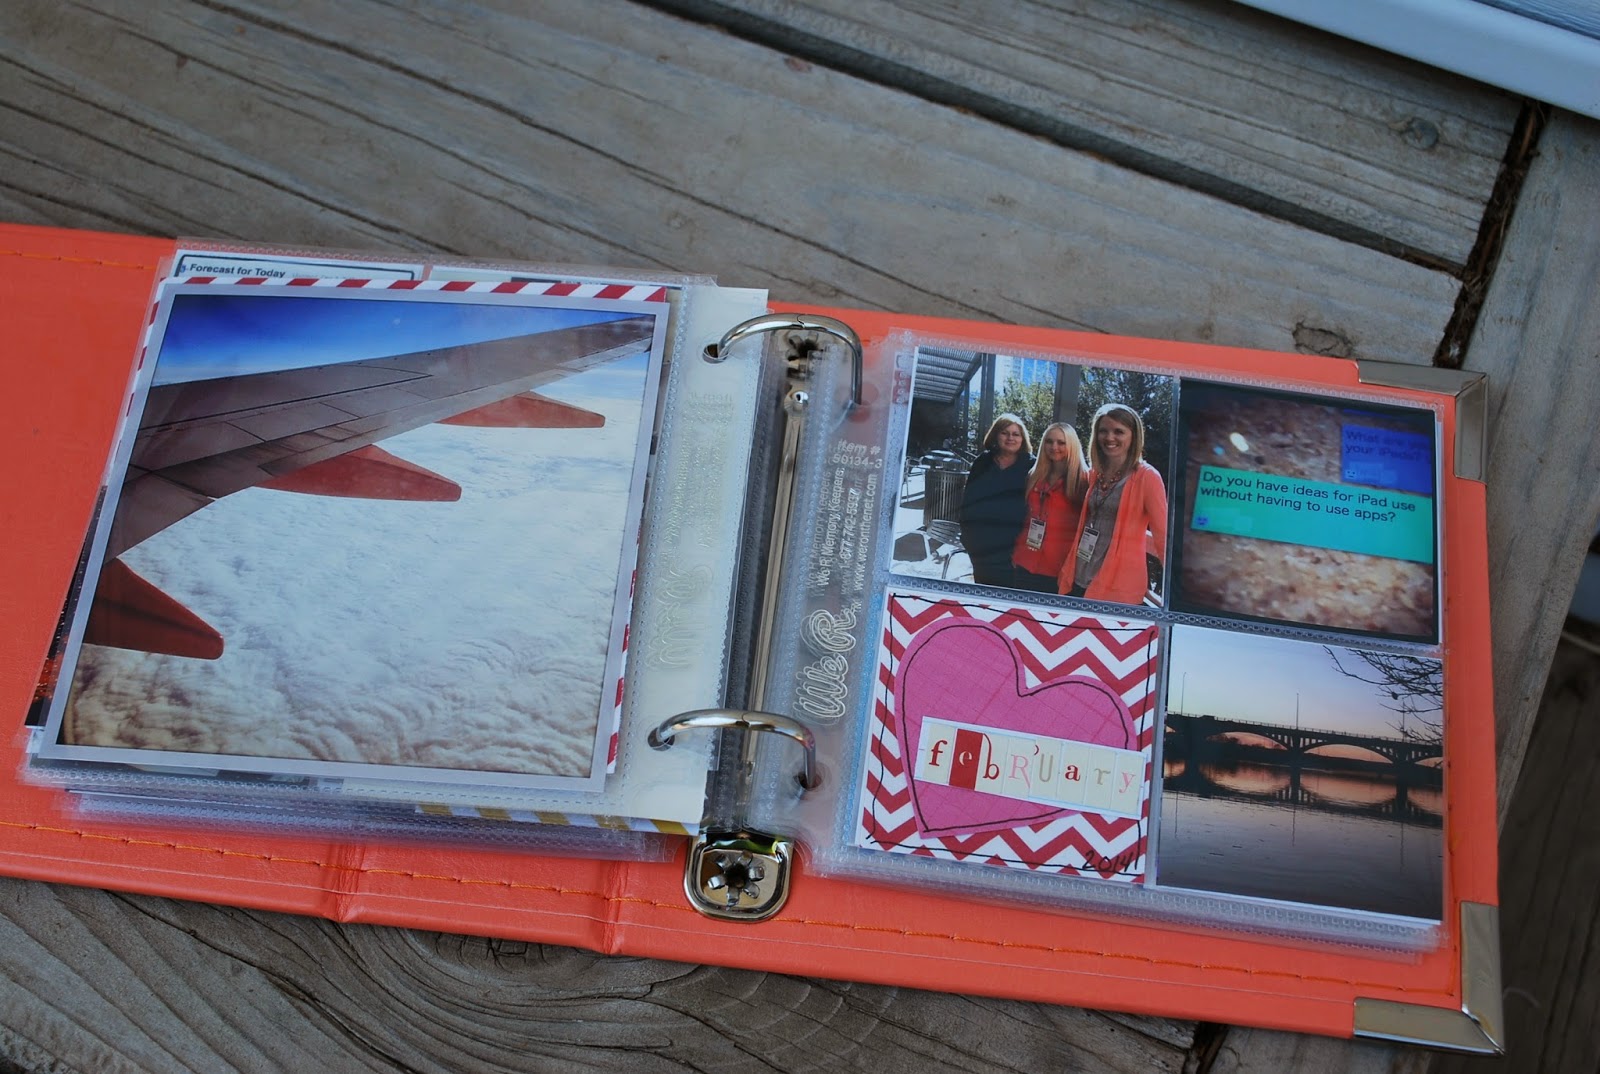
I started looking around the Internet to see what was out there and what people have done with their Instagram photos. There are a few companies that you can create digital books and I played with them a little, but it wasn't really what I wanted. I came across this album from We R Memory Keepers and loved it. It is soooo cute. It's only 4"x4". It's little. It's cute! It's perfect!

 
 It come with a few sheet protectors. There are two different sizes for this album. One is a 4"x4" protector and the other had 4 2"x 2" slots.

 
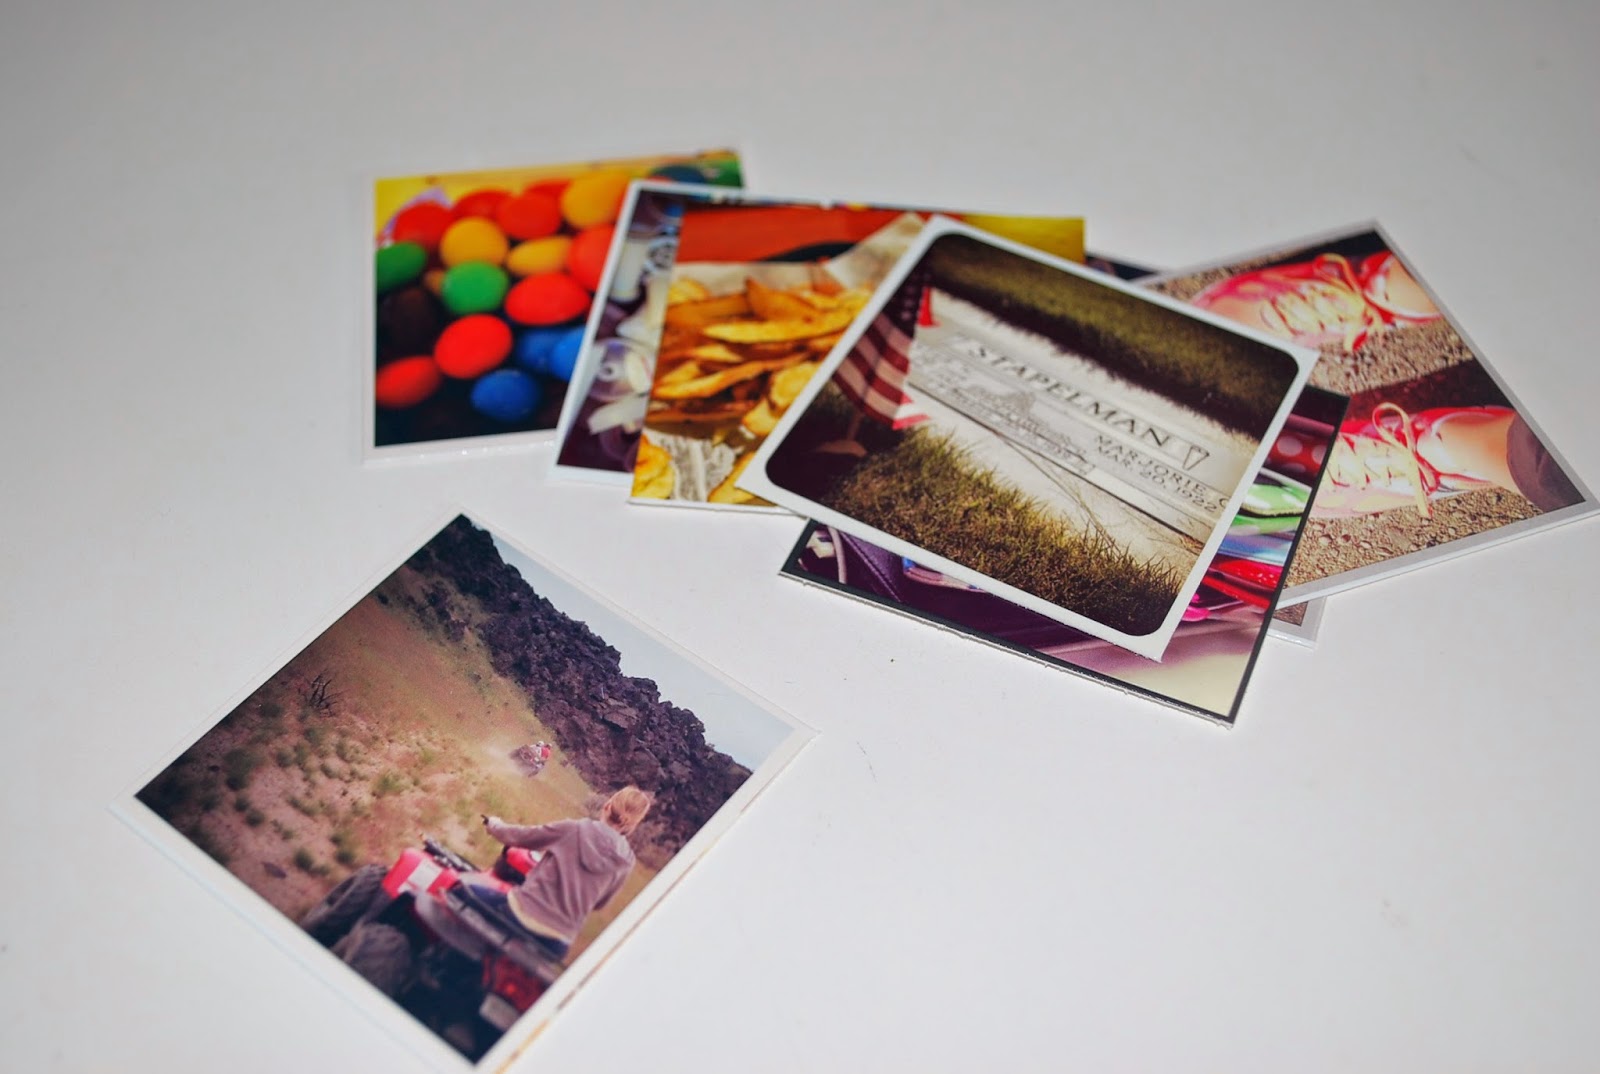
After I uploaded all my Instagram photos to my computer, I started to print them. Using Photoshop, I placed four pictures on a 4x6 file. This game me four 2-inch square prints on a sheet.

 
Then I cut them apart. Look how cute they are in their tiny-ness. There are companies that will print your photos this square size. Once I had all the photos printed and cut, I started placing them in the sheet protectors. It probably took me 2-3 hours to complete the whole year's worth of photos.


Saturday, July 19, 2014

Photo Booth Props...that last

I've done several photo booths over the past year. They are so much fun to do and who doesn't love a little prop that makes it okay to look and act cheesy in a picture. The one problem I have with photo booths are that the props don't last. That's a great thing if you are never going to do one again, but if you have a booth frequently, you have to cut the props out again and again. I've been afraid to laminate the props for feat they would give a glare in the picture.
 
Well, as I'm cutting out props the night before our 5th grade party, I have a brilliant idea!!! Cut them out of wood. BrIlLiAnT!!! I actually had a moustache and pair of glasses from the Wood Connection and those props seemed to get used most, so I thought why not cut them all out of wood?  Okay--it was like 9:00 at night when I had this epiphany, so I cut some shapes with my Silhouette and sent my mother to cut them out.
 
 I grabbed the spray paint I had on hand and started spraying in the little light that was left. But, I managed to get everything sprayed (barely), and used pieces of dowel left over from other projects for the handles.  The best part--I'm ready for a photo booth anytime.

Friday, July 18, 2014

Gift Bag Wow!

Need something to dress up a gift bag?
I bought these cute chevron gift bags at Michael's a while ago because they were so cute.
For a Young Women's activity, we did a hygiene and beauty night. We decided to give the girls some little goodies. Well--I thought I had clear bags to put them in--but realized a couple hours before--I didn't. But, I did have these cute gift bags and they worked perfectly. I felt like they needed a little something more though.
I decided to create this cute little printable to help remind the girls that the best way to be beautiful is to be yourself. It serves two purposes--it broke up all that chevron, AND...they can take it off and put it somewhere as reminder.
 
It really made the bag go from cute pattern, to CuTe!!! I bet there's a great gift inside.
It's all in the packaging!!


If you can use this tag, here you go..
Be*You*Tiful printable

Wednesday, July 9, 2014

Italian Soda and Popcorn Bar

First up was the Italian Sodas. We've been making these for a year now and they are really fun addition to a party and perfect for large groups because everyone can mix their own. It's really easy too. We did invest in the pumps for our flavoring a couple months ago and it is so much easier to use than having to pour out the flavoring and measure.
 
Since it's summer, we decided to use beach toys for our display. Again, pretty easy to set up. We had popcorn in various containers, with some flavoring, and candies that could all be mixed in the brown paper bag.


Tuesday, July 8, 2014

Paper Bag Printing

Merlynn has to do the treats for Relief Society activity focused on family reunions. She decided to do Italian Sodas and a Popcorn bar. These are fun, quick, easy treats that can be used for large groups of people. We decided to print the directions on the bag people would put their popcorn in. That way there wouldn't be extra papers and she wouldn't have to repeat the instructions again and again.
 
It's pretty easy to print on a paper bag. Well, that is if you can get your printer to work ---mine was not cooperative for this project. All you need to do is create your document in Microsoft Word and change the paper size to that of the paper bag. Type up what you want, then send your paper bag through the printer.
 

Thursday, July 3, 2014

Layered 4th of July drinks

Today we tried something that was super easy and totally for the 4th of July. For the past couple of weeks we have been seeing this layer drink on Pinterest so I thought I would give it a try. I figured it would be easy and both the girls could help make it. It was so fun and the best part was it tasted good. The combination of the crane-apple and the pina o coloda tasted really good. I followed the directions from this website. http://www.inkatrinaskitchen.com/2012/06/july-4th-layered-drinks.html
One thing that we had to be careful of was to poor the drink onto the ice so that they wouldn't mix. I think that is why there isn't as much white.

4th of July and burlap

A couple months ago, I saw these really cool burlap canvases at Wal-Mart, so I bought them, knowing I would be able to do something fun with them. I've been looking at this cute burlap banner from Eighteen25 to make--but I've ran out of time (and I didn't have a foam brush when I went to make it), so I decided to use the same idea for the burlap canvases.


First, I gave the canvas a few coats of paint. I cut a star with my Silhouette, and used the negative space for my stencil.


Next, I used a foam dauber to make polka dots, and they were done. They were really quick and easy to make. I do wish I had an 8x10, so they were different sizes. Bonus: I can use the red polka dot for Valentine's Day decorations also.